Blown-In Attic Insulation
Blown-In Attic Insulation Las Vegas NV
Vegas Handyman Services

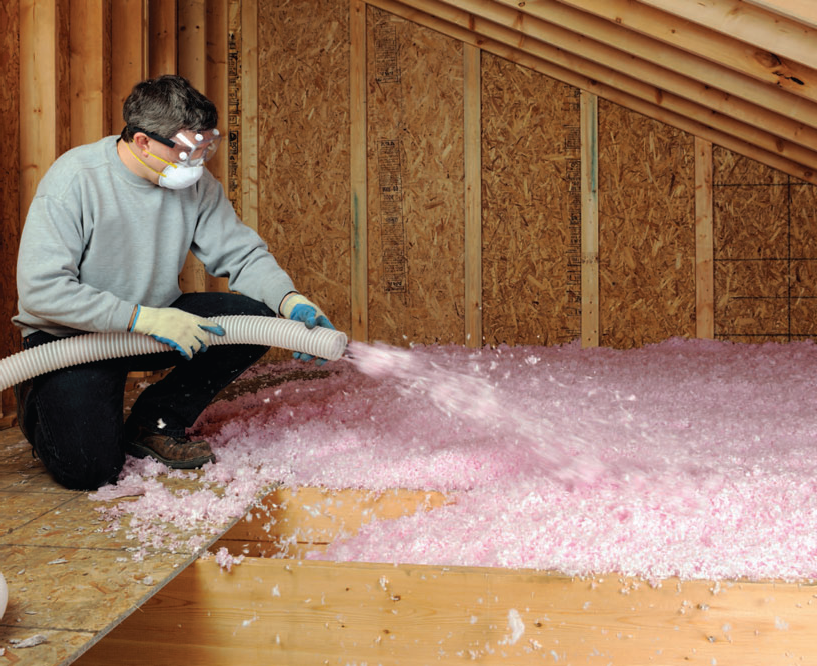
Blown-In Attic Insulation: Blown-in cellulose insulation (also called loose fill or wool insulation) is especially useful in unfinished attics or attics with hard-to-reach areas. If you need to add insulation in your attic, save big by blowing in cellulose insulation yourself. The pros charge $800 to $1,000 to do a 1,200-sq.-ft. house. You can do it yourself for about $500. Blowing attic insulation isn’t hard, but it’s dusty, sweaty work. Cost Of Blown-In Attic Insulation? Free Estimates! Call Today Or Schedule Blown-In Attic Insulation Online Fast!
BLOWN-IN ATTIC INSULATION
Las Vegas, NV Blown-In Attic Insulation Company
Blown-in cellulose insulation (also called loose fill or wool insulation) is useful in unfinished attics or attics with hard-to-reach areas. Without adequate insulation, summer heat generated there transfers into the living space of the home and increases the demand on the air conditioning system. During the winter, inadequate insulation causes heat loss and overworks the heating system. Properly insulating your attic reduces the rate of heat transfer and stretches your energy dollars.
TOOLS & MATERIALS
- Work gloves
- Goggles
- Dust mask
- Tape measure
- Flashlight
- Insulation blowing machine
- Cellulose insulation
- Polyethylene
- Plywood or boards for temporary flooring
PREPARATION AND INSTALLATION
Like batts and rolls, blow-in insulation is also specified by R-value, but this is not the same as inches of thickness installed. It is a calculation of quantity of materials and rate of blowing needed to reach a desired density and height of material and cover the entire space. To achieve the desired R-value, it will be important to follow package labeling. The minimum number of bags per 1,000 square feet is based upon the net area of the space to be insulated.
Blow-in insulation is highly compressed in the bag. The blowing machine is designed to open up the insulation material, fluff it, and then blow it out through the hose at the rate you set to achieve the specified coverage and R-value.
A useful guide for installing the proper amount of blow-in insulation is to mentally divide the space into four equal parts. Then you can figure how many bags should go into each quarter of the space. For example, if you have 24 bags of insulation, you would blow six bags into each of the quadrants.
STEP 1
Determine the R-value required in your area by using the chart below or contacting your local contractor or building inspector.
Zone Roofs Walls Floors
1 R49 R28 R25
2 R49 R22 R25
3 R49 R18 R25
4 R49 R18 R25
5 R49 R18 R25
6 R49 R18 R25
STEP 2
Use our blown-in cellulose calculator to determine how many pounds of insulation you need. The calculator also tells you how deep the insulation should be to obtain your R-value.
STEP 3
Determine how many rafter vent / baffles you need (use one for each soffit vent).
STEP 4
Plan to install the insulation in the early morning hours before the attic heats up.
STEP 5
Use plywood to make a temporary walkway by resting a sheet across the ceiling joists.
STEP 6
Install the rafter vents adjacent to the soffit vents. The rafter vents prevent insulation from blocking airflow from the soffit vents.
STEP 7
Lay the polyethylene vapor barrier between the rafters, and staple it in place. Ensure that the barrier is at least 3 inches away from recessed lights, chimneys, flues, or other heat-producing devices.
STEP 8
Set up the blowing machine according to the manufacturer’s instructions, and begin blowing the insulation into the attic. Hold the hose parallel to the floor. Begin at the far wall and work toward the center. Always blow in the direction of the joists. Be careful to step only on floor joists, or else you might accidentally put your foot through the finished ceiling below. Stop periodically to check the depth of the insulation.
STEP 9
Continue blowing insulation until the attic floor is covered to the correct depth. Where possible, back away from the work to avoid packing the insulation. Be sure to get insulation to the top of the walls and low places. Don’t cover eave vents.
Keep the hose close to the floor where insulation must go under obstructions like cross bracing and wiring. Insulation must be blown on both sides of these kinds of obstructions. If an obstruction has caused a low spot to occur, fill in the area.
CALL US FOR:
- Blown In Attic Insulation Pros And Cons
- Blown In Insulation Machine
- Blown In Insulation Calculator
- Blown In Insulation Contractors
- Blown In Insulation Home Depot
- Lowes Blown In Insulation
- How To Install Blown In Insulation In Walls
- Blown In Attic Insulation Cellulose Vs Fiberglass
SERVICE AREA
- Las Vegas NV Blown-In Attic Insulation near me
- Boulder City NV Blown-In Attic Insulation near me
- Enterprise NV Blown-In Attic Insulation near me
- Henderson NV Blown-In Attic Insulation near me
- North Las Vegas NV Blown-In Attic Insulation near me
- Paradise NV Blown-In Attic Insulation near me
- Spring Valley NV Blown-In Attic Insulation near me
- Summerlin NV Blown-In Attic Insulation near me
- Sunrise Manor NV Blown-In Attic Insulation near me

